Click the Workflows tab from the sidebar to open the Workflows page.
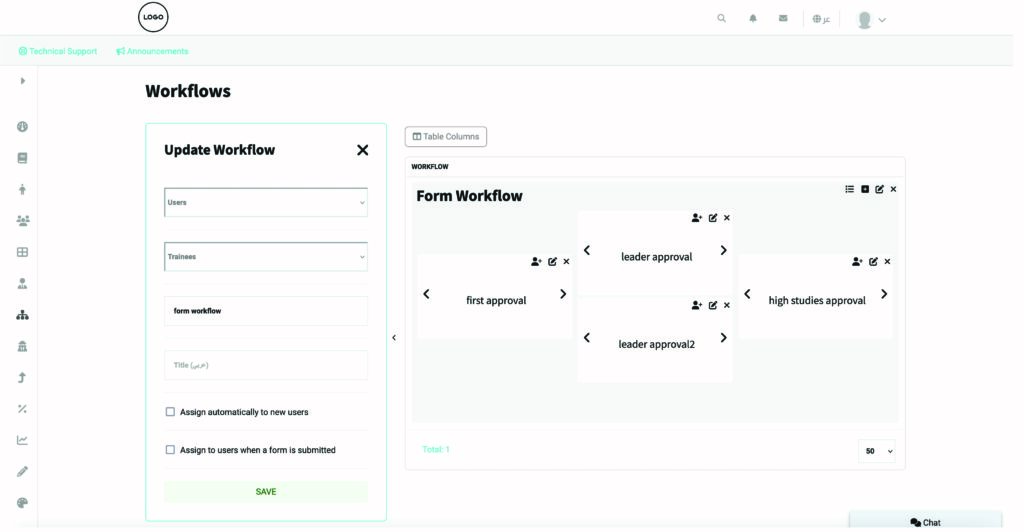
Configuring the Workflow #
- Fill in the workflow details.
- Choose the Type of Users to link the workflow to (Corporates, Trainers, or Trainees).
- Enter the Workflow Title in both English and Arabic.
Assigning the Workflow #
- Choose how to assign the workflow:
- Automatic Assignment: Assign the workflow automatically to new users.
- Form-Based Assignment: Assign the workflow when a form is submitted.
- In this case, admins must create a custom page that includes a form.
- The workflow will then be visible in the Trainee’s account.
Adding Workflow Levels #
- Add levels to the workflow:
- Enter the Level Title in both English and Arabic.
- Specify the Number of Steps for the level.
- Choose whether the level should be Bypassable or Downgradable.
- Write the Template Email for approval or rejection notifications.
- Click Add to create the level.
Managing Workflow Owners & Users #
- Add Owners (Admins or Corporates) to the levels.
- Assign users to manage the workflow status (Approve or Decline).
Viewing Workflow Status #
- The workflow status will be visible in the Trainee’s account.
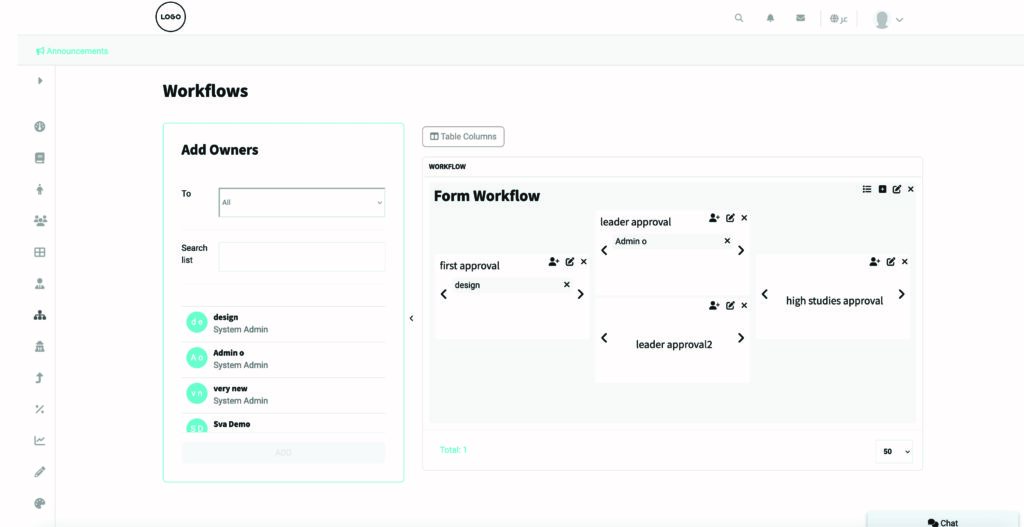
- Add Owners (Admins – Corporates) to the hierarchy levels.
- Assign users to manage the workflow status (Approve or Decline).
- The Trainee account will display the status.


