Skip to content
| User Manuals
| User Manuals

en_US English
en_US English ar Arabic fr_FR French

| User Manuals
| User Manuals

Administrator

  • Notification
  • New Landing Page
  • Auto-Enrollment
  • AI X-Sera
  • Edit Profile
  • Logging in
  • Homepage
  • Personal Bar
  • Users Management
  • Corporates
  • Trainers
  • Trainees
  • Styles and Academy Settings
  • Managing Categories
  • Courses Settings
  • Courses
  • Managing Content
  • Managing Sessions
  • Managing Assignments/Surveys
  • Creating/Adding Exam Questions
  • Comprehensive Progress Report
  • Competencies
  • Questions Bank
  • Certificate Templates
  • Learning Path
  • Specializations
  • Coupons
  • Packages
  • Announcements
  • Placement Exam
  • Course Statistics
  • Workflow
  • Setting up Workflows: Utilities
  • Enrollment Report
  • Technical Support

Trainees

  • Logging in
  • Home Page
  • Personal Profile
  • Edit Profile
  • Update Personal Information
  • My Learning
  • Announcements
  • Mailbox
  • Courses Settings
  • Course Content
  • Virtual Classrooms
  • Joining The classroom
  • Classroom Conversation
  • Exams and Assignments
  • Certificates

Trainer

  • LOGGING IN
  • HOME PAGE
  • PERSONAL PROFILE
  • EDIT PROFILE
  • UPDATE PERSONAL INFORMATION
  • MAILBOX
  • Create Course
  • COURSE CONTENT
  • ONLINE SESSION
  • ADDING ONLINE SESSION USING ZOOM MEETING
  • ADDING ONLINE SESSION USING MS TEAMS
  • STARTING THE SESSION
  • JOINING THE SESSION
  • ZOOM CLASSROOM MAIN SCREEN
  • EXAMS
  • Create ASSIGNMENT
  • ASSIGNMENT Settings
  • Advanced OPTIONS
  • Advanced SETTING
  • MANAGING EXAM QUESTIONS
  • CREATING QUESTIONS
  • ADD QUESTIONS FROM QBANKS
  • QUESTION BANK
  • COMPREHENSIVE PROGRESS REPORT
  • COMPETENCIES
  • FINANCIAL REPORT
  • Certificates

Corporate

  • Logging in
  • Trainees
  • Enrollment Report
View Categories
  • Home
  • Docs
  • Trainees
  • Mailbox

Mailbox

< 1 min read

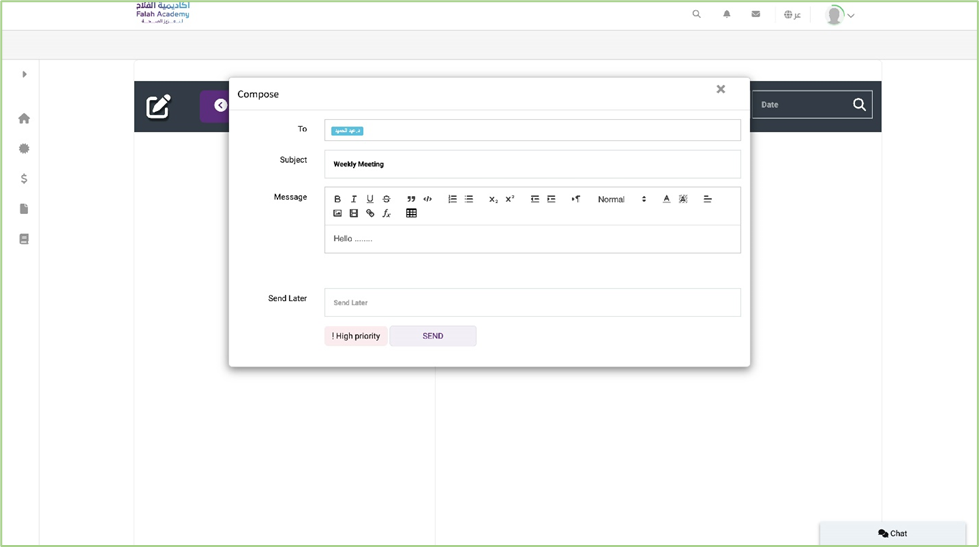
To compose a new message:

  1. Click the mailbox icon on the top bar of the home page.
  2. Type in the recipient’s email address or the name of the user.
  3. Add a subject line.
  4. Write the content of the message.
  5. Add an inline or attached image.
  6. Attach a file or link to it within the message.
  7. Specify The Date and The Time for sending a message later.

The first screen appears when you open your mailbox, The inbox displays the list of messages you have received, along with their subject lines, senders, and the date and time they were received, and you can search for any messages from search boxes.

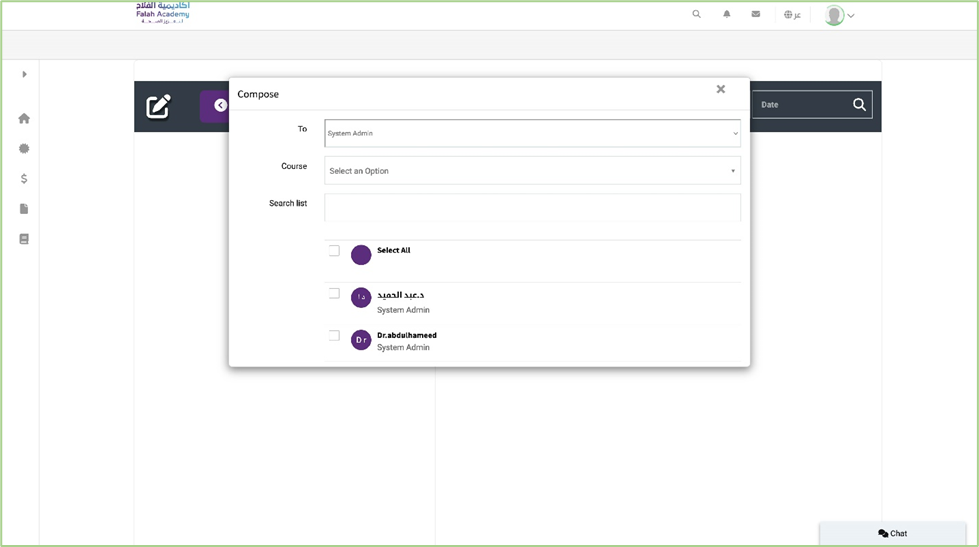
To compose a new message to the admin course, select a user, and course, and select all the users you want.

What are your Feelings

Share This Article :

  • Facebook
  • X
  • LinkedIn
  • Pinterest
Still stuck? How can we help?

How can we help?

AnnouncementsCourses Settings